Friday, 28 February 2014

Voss in Water - How i Took It

Article By: Louish Pixel


product in water
Voss in Water


Taken on Blue paper, piece of glass, bare 580ex II on right with blue gel and bare 580EX II on left with blue gel. Each flash is facing each other and slightly behind the water. Trigger with RadioPopper JrX with 5D Mark II and 100mm 2.8 Macro Lens.

And here's the setup shot.


photographing products in water
Setup shot


Exif Info:

Shutter Speed: 1/160
Aperture: f/3.2
ISO: 100
Focal Length: 100mm
Camera: Canon EOS 5D MK II
Lens: Canon 100mm f/2.8 L IS USM Macro.


Related Reading


  1. Photography Creative Lighting Tutorial – Ghostly Visage
  2. Impact - How I Took It
  3. Light Painting - Behind The Scenes
  4. Dew Drop Flower Refraction Tutorial
  5. Lens Whacking

Tuesday, 25 February 2014

Card Trick - How I Took It

This shot is made by combining ambient light in this case two tungsten lights placed on both sides with camera flash set to second curtain sync.


card trick
card trick

There are two black cards placed between the camera and the lights to avoid flare. 

Exif Info:

Aperture: f/16
Shutter speed: 0.5 sec.
ISO: 800

The camera was pre-focused on the area, a narrow aperture of f/16 was used for maximum depth of field. ISO was set to ISO 800 to make exposure possible at f/16 using only two 60 watt tungsten lamps. A relatively slow shutter speed of 0.5 seconds was used to capture motion of the cards.


Flash was set to second curtain sync so it will only fire at the end of the exposure (this freezes the cards). Refer the user's manual that came with your flash to check whether your flash has a second curtain sync function.

Camera: Canon 5D MKII
Lens: Canon 24-105 F4 L IS USM
Flash: Canon 600 EX RT
Exposure Mode: Manual
Flash Mode: Manual

Flash was gelled orange to facilitate color correction in post. But i liked the yellow tint in the trail so left it at it. While i was at it, i got some more ideas which i need to try, will post the results here in the coming days. Do give this a try, do some variations and post the results in comments below.

Have Fun.


Related Reading


  1. Photography Creative Lighting Tutorial – Ghostly Visage
  2. Impact - How I Took It
  3. Light Painting - Behind The Scenes
  4. Dew Drop Flower Refraction Tutorial
  5. Lens Whacking


Monday, 24 February 2014

What gear to take? 10 Essential Accessories for Travel Photography


I admit packing one’s bags for a trip is a very personal thing and as individuals we all have our preferences on what to and what not to carry. But photographers in general are notorious for lugging around a lot of luggage on trips. This happens partly due to the fact that deep within we all want to capture amazing pictures and never would we want to be in a situation where we need something to make a shot and don’t have the equipment needed with us and partly because we are attached to our gear and do not want to leave anything behind (read we are not very good at balancing functionality and weight).


Travel Photography
Photo by: Jeff S Photoart

Whatever the reason may be it is not advisable to carry everything you own on every trip you make. It just doesn't work that way. Believe me I've made this mistake a couple of times and ended up feeling miserable every time. The point is you need to make compromises when you are packing for travel; you should careful weigh the pros and cons of carrying each piece of gear depending upon the destination, the mode of travel and what you intend to shoot during the trip.


 Essential Accessories for Travel Photography
Photo by: Thomas Leuthard


The right approach to gear for travel photography is “less is more”. One important thing to consider is your mode of travel. If you are on a road trip in your own vehicle or a vehicle hired for the trip, you could afford to carry enough gear as you could use the vehicle to keep your gear safe and need not carry everything to your hotel room and back every night you stay. But if your travel involves a lot of walking, using public transport, or if you main intention is not photography (leisure trip/vacation) then it is better to stick to the bare essentials. Here’s a list of the most essential accessories for travel photography (assuming you are a DSLR user).

1. Camera Bags


Perhaps the most important accessory for travel photography is a good quality camera bag which is about the right size for the equipment you need to carry, will offer sufficient protection to your gear, is easy to take out and put in things and easy to carry around.


In General backpacks and shoulder bags tend to provide you with the most flexibility for travel photography. Having a bag that you can carry around and shoot with and is easily accessible is very important. If your trip involves air travel then it will be wise to make sure your bags comply to FAA’s maximum carry-on size limits. Some good ones you could consider are from Porta Brace, Lowepro Event Messenger Series or Pelican’s 1510 series Carrry on Cases.

2. Compact Camera Support Systems


Carrying a full sized tripod along is not practical on many occasions; however when situation demands one make sure you choose light weight carbon fiber tripods that could be folded to very small sizes. One good recommendation will be the Traveler series from Gitzo.

On trips when you don’t need a full sized tripod, consider other more compact stabilization options like Monopods, Joby’s Gorrillapods or the Novoflex Bean Bag.


One particularly efficient alternative to a tripod is a monopod. Though you will still need to have a relatively steady hand, a monopod will do most of the work for you, while being smaller, lighter, and cheaper than a tripod.


Flexible rubberized design of the gorrillapods makes it possible to wrap around a variety of objects like poles, trees or furniture. They could also be fit into very small bags due to their compact nature.


For maximum portability choose bean bags, you can carry around an empty bean bag and fill it with any material that is available at the location. They have a waterproof inner lining which allows you to fill it up with wet sand or dirt and a leather exterior for maximum grip to prevent the camera from sliding.

3. Portable Backup Solutions


Depending upon the type of trip you might want to carry backup solutions like a laptop, external hard disks, or simply enough spare memory cards. With the prices of memory cards dropping it is now days viable to plan ahead and carry enough memory to last the trip thus avoiding the need to carry anything extra. One thing to remember is that while travelling you will actually shoot a lot more than you think you will and you will go through your memory very fast especially if you shoot RAW. One realistic estimate is that one would shoot an average of 400 frames per day, now calculate the amount of memory required by multiplying that with the number of days and do carry some more.

4. International Plug Adaptor


When travelling overseas, do check up on the specifications of power sources and see if it is compatible with your gear. If not get yourselves an international plug adapter like the Fujifilm World Adaptor that will let you use your equipment with the power available at the location.

5. Adding Location Information to Your Pictures


Geotagging your pictures (embedding location information like GPS co-ordinates for the location) are useful as it lets you know the exact location each picture was taken with pin point accuracy. Geotagging also makes it possible to plot out points on maps with your pictures which could be shared as an account of your travel.


6. Filters


Depending on the type of photos you wish to make you’ll need filters like CPL (Circular Polarizing Filter) GND (Graduated Neutral Density Filter) , ND (Neutral Density Filters) and Infrared Filters. But choosing which ones to carry could be a complicated affair, for example a circular polarizing filter could also double up as a 2 stop ND filter, the effect of a GND filter could be generated (to an extend) in post processing and the use of higher power ND filters and Infrared filters makes tripod shooting mandatory. So choose wisely.

7. Flash


External flash units could come in handy if you plan to shoot indoors and low light scenes, however to improve the quality of one’s shots the flash needs to have a swivel/bounce head or better could be triggered off camera. It also needs batteries and charger. All this could add significantly to the weight of your kit. Consider the conditions that you will be shooting, do your camera have an onboard flash, will it suffice etc. and then make your decision as to whether you need to include it in your kit.

8. General Accessories


USB cable, a small flash light, a small multipurpose tool kit (e.g. Leatherman Wave Tool), plastic bags to keep equipment dry in case of emergencies, small packets of silica gel, Extra batteries, battery charger, camera charger, memory cards etc  should also be considered for inclusion in your baggage.

9. Cleaning Kit


Always carry a full fledged camera cleaning kit with you comprising of rocket blower, small brush, sensor swabs, lens pen, microfiber cloth etc.

10. Insurance


travel photography accessories
Photo by: Photophilde


Well this is not exactly an item you need to carry, but it is one of the most important thing you should consider while planning your travel. You may never need to file a claim, but it is always better to have sufficient insurance cover for you and your equipment. Accidents happen, your gear may get stolen while travelling the risks are enormous so why take chances, even though it’ll cost you a bit extra the peace of mind it provides is well worth it.


Related Reading


Saturday, 22 February 2014

Essential Field skills for Bird Photographers


Once you have mastered your DSLR camera, its settings, various shooting techniques etc you are mostly covered as far as the technical side of bird photography is concerned. However the difference between getting good shots and great shots is not just getting your exposure right, it depends on many factors including your understanding of the birds, their behavior, the way you approach them etc. In this article we will discuss some tips that will help you get close to the birds, read their body language, understand the various clues that they give away, sharpen your reflexes and thus vastly improve your success rate by being able to anticipate what the bird will do next.


Essential Field skills for Bird Photographers
Photo by: David Cook


1. Know Where to Look


The most important skill any birder should possess is the ability to spot the birds; one should have a basic understanding of the habitats of various species of birds. If you are visiting an area do a primary research of the lay of the land, the various habitats present etc


bird photography etiquette
Photo by: John & Fish


For example

If there are lakes in the region you can watch the lakesides for gulls, wildfowl, coots or other water birds. If there are beaches chances are you could find many species of shore birds, do an online search to find out more about the type of birds one could find in any particular location, there are many birding groups in the internet and you could easily find many helpful information like where to look for, what to expect, best times to visit, if needed where to get permits, weather conditions etc.

2. Study Your Subjects Well


bird photography
Photo by: John & Fish


Do spend a lot of time watching the birds, observe their behavior, find patterns, for example if you look closely you could see birds repeating certain things over and over like a bird coming to a flower for nectar, hovering-feeding-hovering- feeding - flying back then repeating this or birds when they are feeding chicks, the parents will fly off from the nest – come in with food – land on a nearby branch – observe the surroundings for a while – go to nest and feed the young – fly off – repeating the same sequence, coming back to land at the very same spot from which it observed the surroundings earlier. So if you observe closely you’ll know what’s going on and will be able to get much better shots.

3. Dress Appropriately


It is advisable to avoid vivid colors and wear dress that camouflage you well with the surroundings. The same goes for your equipment, camouflage covers like LensCoat work well to make your long lenses blend in with the scene.

4. Carry Plenty of Water and Food


Birding could extend much longer than you have initially planned; it is also very taxing on your resources, so it is important to remain hydrated. Carry some food and water with you, if needed you could throw some food to the birds to either earn their trust or to make them come closer for better shots.

5. Take Your Time


bird photography tips
Photo by: Danny Perez


Once you get to a location to photograph birds don’t be in too much of a hurry to start shooting. Do spend some time watching and assessing the scene; do take in details like the lay of the land, wind direction, which direction is the light coming from etc. also observe the birds behavior what species are present, are they active or are they resting, if they are active are they feeding, engaging in territorial fights, are they relaxed or agitated etc.

6. Approach Carefully


bird photography ideas
Photo by: Ali Arsh


Your success rate is directly proportional to your ability to get close to the birds without spooking them. Plan your approach, move slowly, smoothly, avoid erratic movements, conceal your long lenses (don’t hold them out in plain sight the birds feel threatened) take your time, move few feet then rest  give the birds some time to get used to your presence and then move. Whenever possible use your car as a mobile hide, birds are not threatened by the shape of a car but they will immediately fly off if you get out of the car. The human form is much more threatening than that of a vehicle.

7. Pay Attention to the Direction of Light and Wind


bird photography techniques
Photo by: FMJ Shooter


Ideal conditions for shooting birds are when the sun in behind you illuminating the birds, it is also important to consider the direction of the wind as it effects the birds flight behavior. Large birds in particular tend to take off and land into a head-wind for maximum lift. You can use this to anticipate the direction in which they will take off and land. Birds also turn into the wind even in midflight (either briefly or for longer periods – hovering).

The ideal birding condition is when you have the best combination of light direction and wind direction; meaning the bird which faces in to the wind is also facing in the direction of the light. Even though this seldom materializes it is good to know so you could aim to achieve it and be aware of any compromises you make.

8. Listen to the Birds Sounds


bird photography tutorial
Photo by: Stuart Williams


Birds like geese and wildfowl call out loudly to each other before them all take off; similarly you could easily be aware of the approach of larger birds such as swans by the sound caused by their wing beats which is very loud.

9. Understand Various Signs


When birds are agitated or when they are about to take off they give off many signs, for example birds lift their tail if they get agitated (may be by your approach) also most perching birds defecate before they take off. So if the bird you are approaching lifts its tail it’s a warning sign for you to stop your advances. Rest a while, give the bird time to relax and then move forward. And if the bird defecates, it is your signal to get ready for the flight shot.

The more time you spend observing and studying your subject the more you understand about them and the better your pictures will look, practice regularly and your skills will improve steadily enabling you to capture some great images.


Related Reading


Friday, 21 February 2014

Getting Exposures right while Photographing Birds in Flight


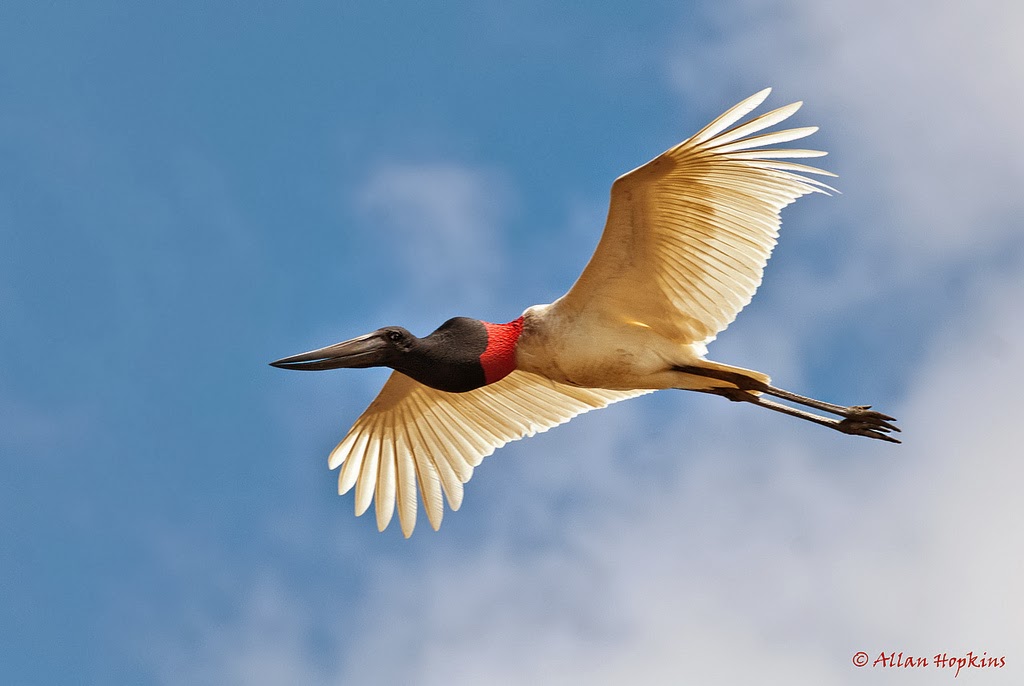
Before we get to setting the exposure part let us first discuss a few situations that lets you capture beautifully lit pictures of birds in flight.


Getting Exposures right while Photographing Birds in Flight
Photo by: Allan Hopkins


As a general rule pictures of birds in flight turn out great when shooting on sunny days than when shooting when there’s lot of cloud cover (read cloudy days).

Select days with bright blue skies for shooting. Ideal conditions for shooting birds in flight are when there is a bright blue sky; the sun is behind you and is low in the sky (during early mornings and late evenings).

During those times the birds are lit from sunlight coming more from the side than directly from the top which somewhat silhouettes the birds. Sun being low in the sky also cures one another problem; of having not enough light on the underside of the birds wings. Try to shoot your birds with wings up which allow the sun to illuminate the underside of the bird beautifully.


Photographing Birds in Flight
Photo by: Pat Gaines


Another important thing to remember is that birds look great when they are illuminated from the front. Pictures in which the tail of the bird is brighter than its head are rather unappealing. In some cases the wings even cast a shadow on the head completely ruining the shot. Therefore whenever possible photograph the bird when it is illuminated from the front.

For example.

If a bird is flying from left to right of your frame the sun should be behind you and more towards the back of your right shoulder.

Tips for Setting Exposure for Shooting Birds in Flight


Tips for Setting Exposure for Shooting Birds in Flight
Photo by: Ken Slade


When photographing birds flying fast against varied background elements, exposure settings could change dramatically and it could easily confuse your camera. Best solution is to use spot metering mode to take your reading off the bird and shoot in Manual Mode. This allows you to expose your birds correctly every time irrespective of the changing backgrounds. Remember the illumination on the bird actually does not change much with changing backgrounds.

Now for those of you who primarily shoot in semi automatic metering modes; you will need to set adequate exposure compensation settings depending upon the scene in front of you. Here we will discuss some of the most commonly encountered situations.

Photographing Birds flying against a Bright Sky


Photographing Birds flying against a Bright Sky
Photo by: Ken Slade


When photographing birds against a bright sky, you will need to set a positive (+) exposure compensation of 1 or 2 stops to prevent the bird getting underexposed. The amount of exposure compensation needed will vary depending on many factors.

 First consideration is how large is the bird in your frame, is the bird almost filling your frame or is it just a tiny dot. If it mostly fills the frame then you need only make minor adjustments to the exposure that your camera suggests and if it is only fills a small percentage then you need to dial in more compensation.

Second consideration is the color of the bird; if you are photographing a white bird against a bright sky you will need more corrections than when photographing a black (or any dark shade) bird. Also take into consideration the first point (How much of your frame is occupied by the bird).

Photographing Birds Flying against a Blue Sky


Photographing Birds Flying against a Blue Sky
Photo by: Isidro Vila Verde


When photographing white birds flying against a blue sky (which is a mid tone value) you will need to dial in some negative (-) exposure compensation to prevent blowing highlights on the bird.

Breaking all Rules


photographing backlit birds
Photo by: Nathan Rupert


Photography is an art and as artists photographers have full creative freedom. Feel free to experiment, break all the rules, try capturing your birds backlit (shoot towards the sun) you could get some very interesting pictures of backlit birds or going further silhouetted bird images against colorful skies.


Related Reading


  1. Bird Photography Tips - Using Monopods, Tripods and other types of supports
  2. Photographing Birds in Flight – Master Focusing Technique
  3. Photographing Birds in Flight – Master Focusing Technique Part II
  4. Tips for Photographing Shorebirds
  5. How to Photograph Birds in Flight Using Manual Focus Lenses

Thursday, 20 February 2014

Bird Photography Tips - Using Monopods, Tripods and other types of supports


Bird photography more often than not involves very long focal length lenses which by their very nature are very heavy. And this is where the use of various accessories for stabilizing the camera comes into play.


bird photography accessories
Photo by: Pedro Szekely


Before we proceed any further let me make it clear that shooting handheld is the best technique to capture birds (especially in flight). But there are situations when you could use accessories like monopods, bean bags, tripods etc to get better pictures. As a general rule these accessories come in handy when photographing birds that are stationary (like a perched bird).

Bean Bags


tips for photographing birds
Photo by: Valerie


Bean bags are especially useful if you shoot from your vehicle (using your car as a mobile hide) simply attaching the bean bag on the door will give a solid surface to rest your lens (remember to turn off the engine, else chances are the vibration from the engine will spoil your shots). One other situation when they come in handy is when you are shooting birds lying flat on the ground (to get shots of birds on the ground from the bird’s eye level).

Tripods


bird photography
Photo by: Umang Dutt


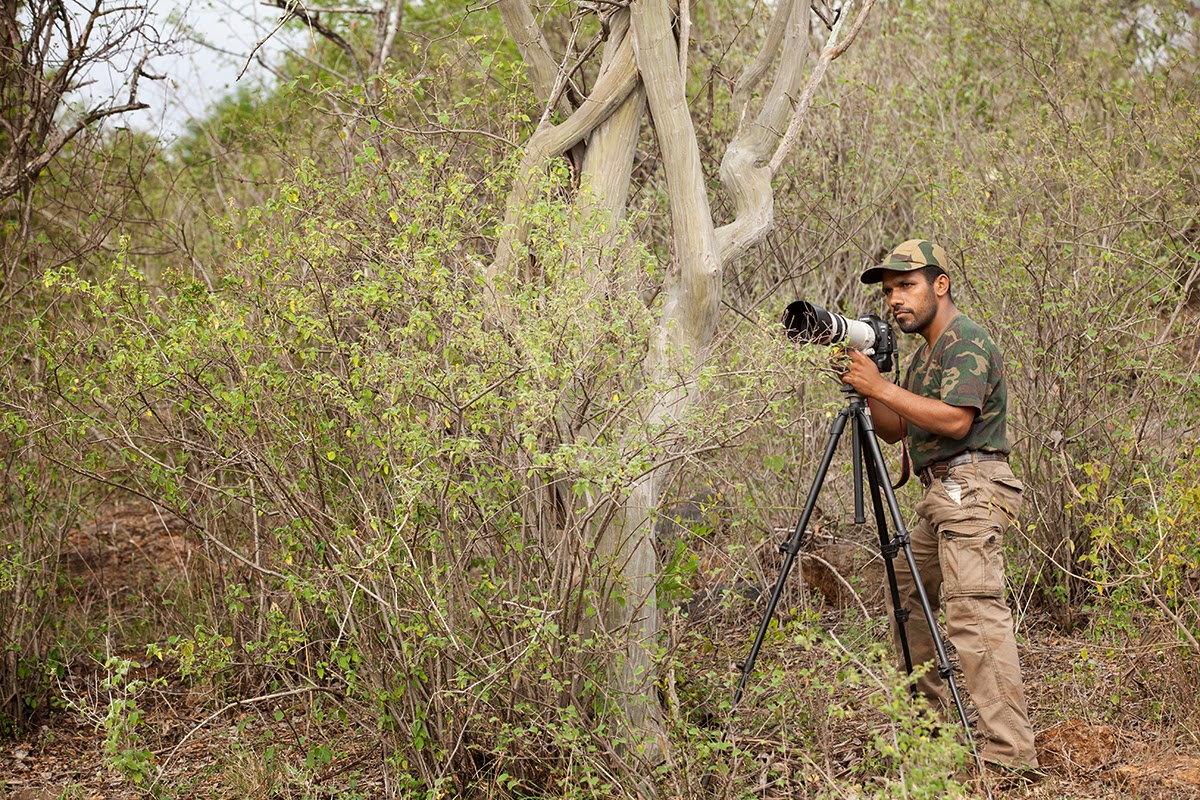
Many of us would not be physically able to wield the heavy, long focal length lenses needed to capture the birds for long periods. If that’s the case with you, a viable alternative is to choose a strategic viewpoint and photograph them from a relatively static position.

Tripods are the most difficult accessories to set up; it takes time and effort to properly set up the tripod for shooting birds. And this significantly decreases your chances of getting the shot at all, but if you manage to get them then there is no comparing the image quality, especially so in low light conditions. Tripods are simply the most stable platforms for your camera. However you will find yourselves in trouble if the bird suddenly shifts positions. To make the most out of tripods get a Gimbal Head which will let overcome the difficulties of shooting with a tripod to a great extent.


how to photograph birds
Photo by: Vishal Patel


Tripods could even be used when you are shooting from a vehicle (it requires placing your tripod legs in some funny angles though. They could be very helpful if you need to watch the bird for a really long time to capture action/behavior/expression etc. (simple set your focus right and wait for the bird to strike an interesting pose). One other situation when tripods could be used is when you know in advance where the bird is going to be, for example when you know that the bird is going to come to a perch using a tripod will give you stunning shots as the bird flies in and then takes off.


Using tripod for bird photography


Tripod is also essential if you intend to set up remote cameras, triggers, flash units etc and capture the birds to get really stunning (staged) images.

Monopods


Monopods are much easier to carry around and use than tripods, but they are not that stable, however they could be help you support the weight of your equipment when you need to hold the bird in focus for a long duration. One significant disadvantage of monopod is that they force your camera to move in arcs that does not match either the birds flight pattern or the natural body movements of humans.


bird photography tips
Photo by: Koshy koshy


The choice whether to shoot handheld or use any support is totally dependent upon the conditions and the photographer.


camera stabilization techniques for bird photography


Sometimes simple techniques like leaning against a wall or a post will help stabilize the shot, or you can use any element already present in the vicinity as support.

Happy Shooting