Thursday, 29 May 2014

How to Calculate the Optimum Plane of Focus and Necessary Aperture for Interior Photography


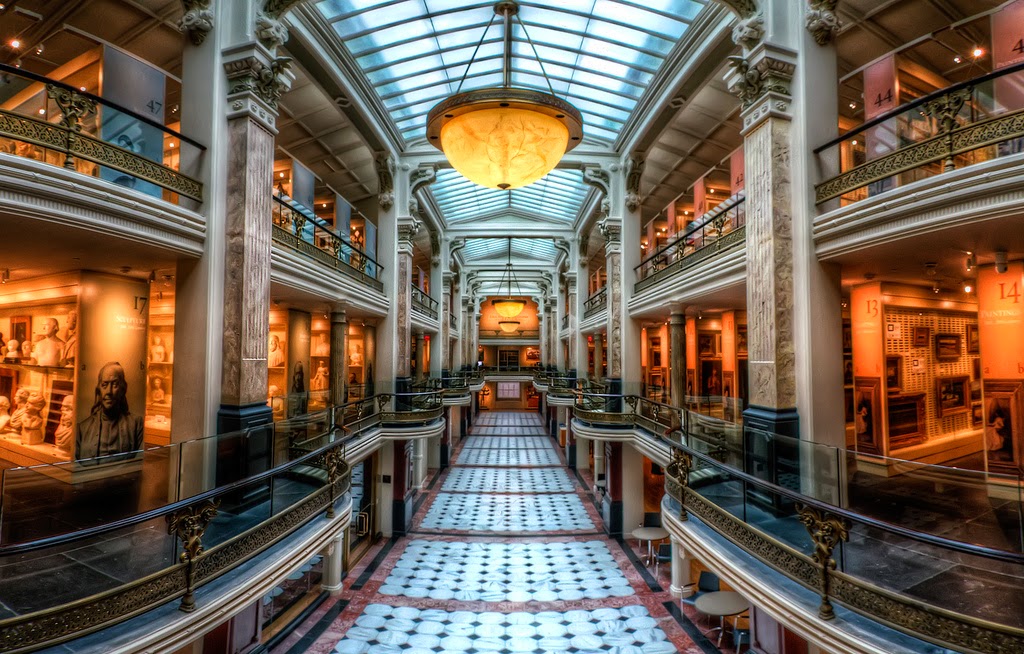
In architecture photography, especially when shooting interiors it is absolutely necessary that you get elements across the frame (from those in the foreground to the ones in the background) perfectly sharp.


How to Calculate the Optimum Plane of Focus and Necessary Aperture for Interior Photography
Photo by: Jijo John


Technically what this means is that one need to set focus at the optimum plane of focus and select an aperture which ensures that the available depth of field extends to cover the nearest and the furthest elements in the frame.

When faced with such a situation what most photographers do is to set focus to the middle, for e.g. when shooting a room that is 40 ft long, set focus to 20 ft; and close down the aperture to say f/16 or f/22 or narrower and shoot. Though this technique could work there are many disadvantages, first of all when shooting interiors it is essential that you find the largest aperture possible that will give you enough depth of field to render elements in the foreground and the background sharp. Working with larger exposures gives you more control in terms of flash power and also exposure times. Thus in a way it also allows you to work with low ISO settings giving you the sharpest pictures with the least amount of noise.

It is not only about exposure times or flash power, the image quality of even the best lenses start to deteriorate at apertures narrower than f/22 due to diffraction. All the more reason to find the largest working aperture.

Finding the Optimum Plane of Focus


Though setting the lens to focus at a point half way between the foreground and the background will work, you will find the results are better if you set the lens to its hyper focal distance when shooting large interiors; for small spaces set focus to approximately 1/3 distance from the camera to the farthest wall of the room. The hyper focal distance chart given below shows hyper focal distances for full frame sensor cameras for most commonly used focal lengths in interior photography.

Hyper Focal Distance Chart for Full Frame Cameras


Hyper Focal Distance Chart for Full Frame Cameras


Finding the Largest Aperture with Enough Depth of Field to Cover the Entire Room


In the earlier days all SLR camera lenses had depth of field scales engraved on them. But only very few lenses have that feature now. But the good news is everyone now carries a smartphone with them and there are many applications like Depth of Field Calculator and ‘Photobuddy’ that could help you find both hyperfocal distances and also available depth of field for any focal length, focusing distance and sensor size combination.

In some discussions happening at some forums i have seen some people recommending the use of depth of field preview button to check whether the selected aperture has adequate depth of field, but in my experience it is near impossible, considering the light levels in most interiors. But one piece of advise given along with it seems worthy of mention. If there is a doubt, do stop down a couple of stops more and also ensure that the background is in focus rather than the foreground, as this tends to be more visually acceptable in architectural work.

Tuesday, 27 May 2014

Aerial Architectural Photography


When we hear the term aerial photography, what instantly comes to our minds is high altitude photography from a helicopter or an airplane. Yes such high altitude photography is a separate branch on its own, but it should be noted that the term aerial photography also includes lower altitude photography from any height above eye level.


Aerial Architectural Photography
Photo by: Jijo John


So to summarize aerial photography in a general sense means high altitude photography which usually gives us the whole site shots, but within the context of architectural work aerial photography means shots taken from any height above eye level. This includes shots taken from ground bases structures from a simple step ladder, to scaffolding towers, to scissor lifts, hydraulic platforms or from the roof of a vehicle or a building conveniently located near the site.

Such low altitude shots gives us a very different view showing an alternative perspective which we generally never get to see with our eyes thus making them special and interesting. This is the reason why such shots find their way into the portfolio of all major architectural photographers. If you notice shots especially of the front elevations, more often than not you will find at least one that is shot with the camera at a height greater than eye level. When it comes to photographing tall buildings, raising the shooting height becomes a necessary rather than an aesthetic choice. Refer the article How high should I position my camera for best results for more on this.


Related Reading


  1. Tips for Photographing Shopping Malls and Retail Stores
  2. How to Photograph Buildings Situated In Narrow Streets
  3. Creative Architecture Photography Compositions - Shooting Upwards - Deliberate convergence of verticals
  4. Architecture Photography Tips for Getting Great Results in Adverse Weather Conditions
  5. Infrared Architectural Photography

Monday, 26 May 2014

Tips for Photographing Shopping Malls and Retail Stores


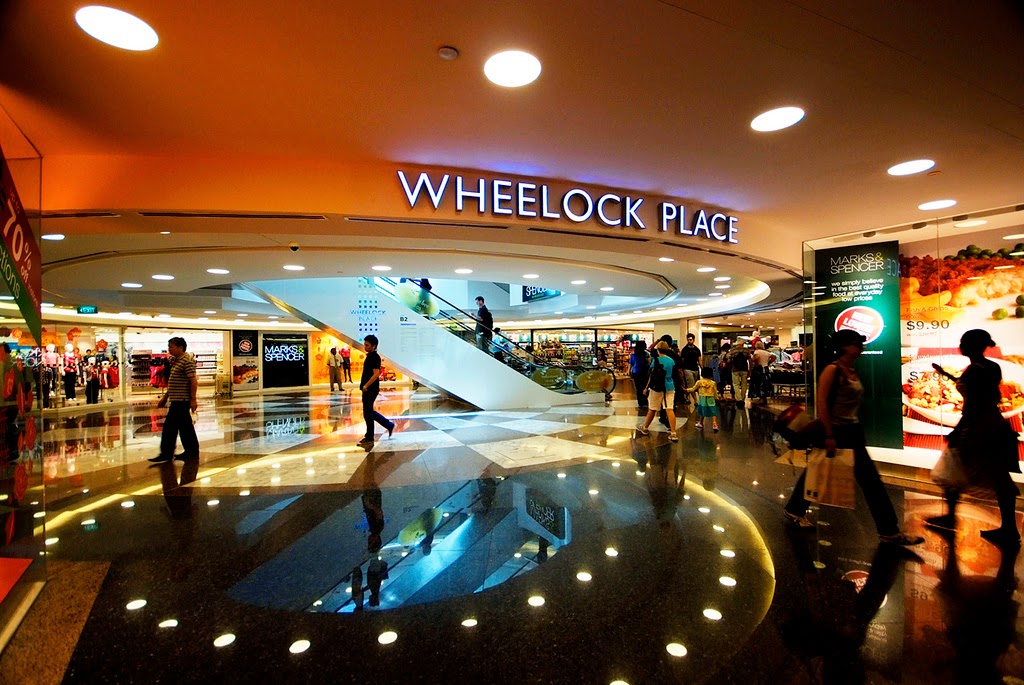
In majority cases professional architectural photographers are hired to shoot large shopping malls and retail stores with the intent to generate material required for marketing those properties. From the stand point of the photographer this means is a whole new game.


Tips for Photographing Shopping Malls and Retail Stores
Photo by: William Cho


The fundamental requirements of architecture photography like getting exposure, focus and depth of field right, getting verticals straight etc. are still relevant but in addition to the technical details, now there is an added objective; to convey an impression of the function of the building. To create an atmosphere that shouts success, of thriving business, trading, commerce etc. all in the backdrop of the building that is being photographed. The need to reproduce the structure in the best way possible now becomes secondary to the need to convey the function of the building.

Though some exterior shots showing the whole building, its surroundings (the setting/ immediate environment) and also close up detail shots will be required, most of the work will be inside of the mall as it is where the bulk of the activity actually takes place. To make the place look lively the photographer should pay attention that each of his frames show as much signage of major international brands as possible and is filled with plenty of attractive people. Young men and women, middle aged couples, parents with children all well dressed and who look like regular shoppers who spend a lot of money. Such a setting serves to shift the focus of attention from the building to the activity that is taking place. Make sure the setting of the building is also well captured coz that is what the viewers will pay attention to once their minds register the activity that is happening.
  

Tips for Photographing Shopping Malls
Photo by: Mononc' Paul


Most malls are lit with a combination of daylight and artificial lighting, light levels are more often than not adequate for photographic work. However using a tripod is highly recommended, so is the use of diffused fill in flash for detail shots.

Since you have a situation that has both stationary and moving elements present in the frame, there are many creative possibilities that you could use to further enhance the appeal of your images. The options are:


  1. Shoot at higher shutter speeds and completely freeze all movement.
  2. Shoot at slower shutter speeds to register movement of people while other fixed elements stay stationary.
  3. Use technique called dragging the shutter with flash to both register movement and freeze action at the time of image capture. Using second curtain sync will generally produce better results than standard first curtain sync.


The three options given above produce very different results, do give them all a try as it could add a lot of variety to your pictures. Remember the slower the shutter, the greater the movement captured and vice versa. Fill in flash if used also serves the purpose of removing any color casts caused by the artificial lights illuminating the interiors.


Tips for Photographing Retail Stores
Photo by: KHAIRIL FAIZI


Now comes the trick to exaggerate the crowd, to create a busy feel to the picture. By using longer focal length lenses one could effectively compress the foreground, middle ground and background. Though this does have the effect of flattening perspective, the compression helps make people in the foreground, middle ground and background look as if they are a unified group. It also enhances any signage in the background because they are reproduced in a larger scale. The important thing to remember when shooting with longer focal length lenses is the depth of field; make sure you stop down the lens enough to render objects from the foreground to the background acceptably sharp.


Related Reading


  1. How to Photograph Buildings Situated In Narrow Streets
  2. Creative Architecture Photography Compositions - Shooting Upwards - Deliberate convergence of verticals
  3. Architecture Photography Tips for Getting Great Results in Adverse Weather Conditions
  4. Infrared Architectural Photography
  5. Panoramic Architectural Photography

Sunday, 25 May 2014

How to Photograph Buildings Situated In Narrow Streets


Restricted space is one of the most common issues faced by architectural photographers who mostly work in large cities. Large buildings situated in relatively narrow streets are difficult to photograph.


How to Photograph Buildings Situated In Narrow Streets
Photo by: Ulrich Kersting


In most cases, surrounding structures restrict the photographer from shooting from the ideal angle. Also the choice of focal length is dictated by the size of the building and the amount of space available. A relatively large building nestled in a narrow street could only be photographed from an oblique angle using a wide angle lens.

The larger the building and lesser the space, the shorter the focal length one need to use. Remember the shorter the focal length, the greater the distortion. The important thing to remember in such situations is that the shorter the focal length the less oblique the camera to building angle should be.

One alternative to minimize perspective distortions and the obliqueness of the camera angle is to shoot a panorama. Shoot different frames that slightly overlap each other (say 25%) and stitch them together in image editing programs like Adobe Photoshop to get a single shot that resembles an ultra-wide angle of view without the distortion. If you are stitching images together you can afford to use longer focal length lenses and that is part of the reason for distortion free images. Tilt shift lenses with their ability to make cross shift movements make such stitching much easier.


Related Reading


  1. Creative Architecture Photography Compositions - Shooting Upwards - Deliberate convergence of verticals
  2. Architecture Photography Tips for Getting Great Results in Adverse Weather Conditions
  3. Infrared Architectural Photography
  4. Panoramic Architectural Photography
  5. Using Fish Eye Lenses in Architecture Photography

Saturday, 24 May 2014

Creative Architecture Photography Compositions - Shooting Upwards - Deliberate convergence of verticals


We humans are accustomed to looking forward, the horizon is always there in our view guiding our sense of balance. It is only when we either look up or down that we let the horizon out of our view. Since this is not what we do very frequently, simulating the process of looking up in architectural photography could produce interesting shots that are intriguing to our senses due to lack of spatial relations.

In case of exterior shots the sky acts as a large uniform background that perfectly offsets the features of the building, while shooting interiors such a shot could easily convince the viewer that a wall is a ceiling or vice versa.

Deliberate Convergence of Verticals


When shooting from the ground with the camera pointed upwards, verticals in the picture will start to converge. The trick to make this work is to take it to extreme levels, where any one viewing the picture could easily identify that it was done on purpose. Anything less than extreme could make the image appear as if it was an error on the part of the photographer, an unsuccessful attempt to keep verticals straight.


Creative Architecture Photography Compositions
Photo by: Simon & His Camera


There are basically two situations where one might want to try tilting the camera up, one such situation is when photographing a building with a perfectly symmetrical front elevation. Here we shoot from a very low angle, often as low as our tripods go, tilt up so as to include the full height of the building and shoot. Using wide angle lenses in these situations could help produce some very dramatic effects by enhancing those diagonals that result from shooting up close. The important points to remember here are to keep the horizontal base of sensor plane parallel with the wall and to make sure you have aligned your shot (by positioning the camera in the perfect center of the structure) while composing the frame.

Another common application of this technique is when photographing very tall buildings. By shooting from a relatively close distance, tilting the camera up to include even the top of the building one can truly dramatize the sheer height and scale of the building. Remember one might have to tilt the camera a great degree in order to cover the entire building from such close distance. Depending upon the height of the building, the shooting distance and the intended effect one might either use a normal lens or a wide angle lens; wide angle lenses exaggerate the linear perspective, there by emphasizing the height and presence of the building, make the shot more dramatic.


Deliberate convergence of verticals in Architecture Photography
Photo by: Simon & His Camera


However this technique of deliberately converging the verticals for effect does not work for buildings that have long, low front elevations. Structures that are wider than they are tall will appear as if they are both falling over backwards and on itself if photographed by tilting the camera upwards; needless to say this makes for a very uncomfortable viewing experience. Hence this composition technique should only be used on tall buildings.


Related Reading


  1. Architecture Photography Tips for Getting Great Results in Adverse Weather Conditions
  2. Infrared Architectural Photography
  3. Panoramic Architectural Photography
  4. Using Fish Eye Lenses in Architecture Photography
  5. Using Reflections in Architectural Photography Compositions

Wednesday, 21 May 2014

Architecture Photography Tips for Getting Great Results in Adverse Weather Conditions


On many occasions when shooting to meet a deadline, architectural photographers are forced to shoot in less than ideal weather conditions. In this article we will discuss some tips to get satisfactory results even in adverse weather.


Architecture Photography Tips for Getting Great Results in Adverse Weather Conditions
Photo by: Jijo John


One major problem when shooting buildings is that of overcast sky that is dull and boring and also presents the photographer with an exposure problem (the clouds now act as the light source, meaning the light source is now part of the composition, creating all sorts of problems). One may use white balance adjustment thus giving the picture some much needed warmth. Also a graduated neutral density filter will be useful to reduce the contrast between the clouds overhead and the building. One trick that works is to shoot RAW, process the image using two different white balance settings, one for the building (warm up) and one for the clouds (cool down / add blue) and then combine them both in Photoshop. This will give you a deep blue sky with the building appearing warm and inviting.

One technique that always works in adverse weather conditions is to shoot the building late in the evening. These are generally referred to as Night shots, though they are taken during twilight, the time after sunset and before the sky turns completely dark. The trick is to shoot at the right time when the interior lights and exterior light levels balance evenly. By shooting at the right time one could capture a view that shows detail in both the exterior and the interiors, refer the article Getting Timing and Exposure Right for Night shots of Buildings for more on this technique. The beauty of this alternative is that as it darkens the sky appears deep blue even under overcast conditions.

On certain occasions, conditions might not be overcast but blank un-interesting sky with no detail makes image making difficult. Even though such conditions are unfavorable for general photography, it might be a good time to shoot black and whites and infrared images of the buildings.

In general shooting when there is rain is not recommended; even if it’s a small drizzle. Wait for the right moment, there will be breaks in between showers when the sky actually brightens up lighting the building and its surroundings beautifully, and this is the right moment for you to seize the picture. Stormy skies could in certain cases make the building more attractive by adding to its character. It is up to the photographer to decide what works best in each situation and make the most of whatever conditions that are prevalent during the time of the shoot. A skilled photographer takes the very negative thing that makes image making difficult and uses it to his / her advantage by capturing the structure in an entirely different setting, one which people don’t normally see thus making the shot interesting.


Related Reading


  1. Infrared Architectural Photography
  2. Panoramic Architectural Photography
  3. Using Fish Eye Lenses in Architecture Photography
  4. Using Reflections in Architectural Photography Compositions
  5. Creative Composition Tips for Architectural Photographers - Framing the Building

Monday, 19 May 2014

Infrared Architectural Photography


Infrared film was used by professional architectural photographers for a long time to make images of buildings. Infrared photography could produce interesting pictures, especially in bad weather; it could cut through haze, add contrast and produce pure black skies with white clouds thus creating a very dramatic scene.


Infrared Architectural Photography
Photo by: Paul Bica


Just as we mentioned when discussing the use of fisheye lenses for photographing architecture, infrared is also used more for effects. It has the potential to transform seemingly uninteresting structures to something very dramatic that screams for the viewers’ attention; ordinary scenes take on a dreamy look when shot in infrared.

Infrared is also part of the electromagnetic radiation that the sun emits. The digital sensors used in our cameras are also sensitive to infrared and so they could record them. But for general purpose photography, recording the infrared radiation along with normal light only serves to deteriorate the quality of the picture. So a special infrared filter is placed in front of the digital cameras sensor to filter out those rays. One could do infrared photography either by placing an infrared filter over the lens (this filter cuts out all the visible light and only let the infrared rays through) or have the infrared filter in the camera removed to convert the camera for infrared photography. In the second case, the modified camera could then only be used for infrared work.


infrared architecture photography
Photo by: Adrien Sifre


There are certain facts that one needs to be aware for before trying this technique. First thing is that not all surfaces reflect infrared rays equally, this is the reason why those images have a rather ghostly feel to it. Those surfaces that reflect more infrared radiation, for example leaves (chlorophyll in green foliage to be precise) appear white and those that reflect less appear dark.

The level of infrared radiation is not proportional to the brightness level of the visible light, they tend to be stronger during early mornings and later afternoons.


infrared photography
Photo by: Jes


The cameras light meter could be easily fooled when shooting infrared so it is recommended to set your exposures manually via trial and error. One technique is to boost your cameras ISO to its highest and set your exposure to get a properly exposed picture, one you get it right, decrease the ISO and compensate by increasing equal stops in shutter speed. This helps you speed up the process by not having to do the trials with long exposure times.

Wavelength of infrared light is longer than normal light as a result there could be a slight shift in focus when doing infrared work, (effective focal length of lens is greater for infrared than for visible light). Best practical solution is to stop down the lens to increase the depth of field so your subject falls well within the depth of field available and is thus rendered sharp.


Related Reading


  1. Panoramic Architectural Photography
  2. Using Reflections in Architectural Photography Compositions
  3. Creative Composition Tips for Architectural Photographers - Framing the Building
  4. Composition Tips for Architectural Photographers - Balancing Colors in an Image
  5. Tips for Photographing the Progress of a Building from Construction Through to Completion

Saturday, 17 May 2014

Panoramic Architectural Photography


Panoramic photography is one effective solution when the widest lens you have is not able to capture the entire scene in one shot. Stitching multiple shots together helps photographers achieve ultra wide angle of views, images with very high resolution (clarity and sharpness) and size suitable for making big prints.


Panoramic Architectural Photography
Photo by: Jijo John


Most commonly used aspect ratios of panoramas are 2:1 and 3:1. Though they are considered alternatives to fish eye lenses in reality the image proportions are quite different. One could either make vertical panoramas by capturing a series of frames moving the camera vertically or horizontal panoramas by capturing a series of images while moving the camera in the horizontal direction.

Multi-row Panoramas


Multi row panoramas take panoramic photography to the next level, here one takes pictures in multiple rows, as well as columns and then stich them together in image editing softwares. Multi row format is the way to go when one needs a very large image.

Start from the top left of the scene work across keeping an overlap of 25-30%. Once the first row is completed, shift down and back to the left and move across again. Repeat this for as many rows as you wish to capture. A standard longer focal length will be a better choice for multi row images as they produce much less distortions, making your stitching process easier and much more precise.Some photographers even go to extreme lengths stitching hundreds of high resolution images to create gargantuan “gigapixel” panoramas.

Panoramic Architectural Photography


Panoramic technique could be a lifesaver in many situations while photographing architecture; both interiors and exteriors. Vertical panoramas are often used to capture tall buildings with minimum distortion, while horizontal panoramas are used to capture long, low buildings.


panoramic architecture photography
Photo by: Jijo John


While shooting interiors, panoramas are often times a better alternative to using ultra wide lenses which extend into the fisheye territory. Shooting a series of images and joining them together will help you capture the scene with a much longer focal length and thus minimize distortions.

Although one could get reasonable quality just by rotating the camera on a tripod; creating high end panoramic images in architectural photography requires camera and lens to be properly calibrated on special panoramic equipment to prevent curved lines, distortions and improper stitches of objects that are very close to the lens.


Related Reading


Friday, 16 May 2014

Using Fish Eye Lenses in Architecture Photography


Fish eye lenses are ultra wide angle lenses that capture an extremely wide angle of view; say around 180° or 220°degrees. They were originally created for meteorologists and astro photographers to capture the entire sky (e.g. star formations and cloud formations) but was adapted by photographers of other genres who love the artistic distortions they create.


Using Fish Eye Lenses in Architecture Photography
Photo by: Pedro Szekely


Normal wide angle lenses are rectilinear lenses, they create a normal perspective where straight lines in the frame are rendered straight. But fisheye lenses are not corrected for distortions and so they suffer from barrel distortion/curvilinear distortion. Subjects at the centre of the frame appear to bulge outwards, and straight lines curve wildly giving them a dynamic, abstract feel. The greater the distance of the subject from the optical center axis of the lens, the greater the distortion.

Types of Fish Eye Lenses


There are two types of fish eye lenses circular and full-frame.

Circular Fisheye Lenses


A circular fisheye lens captures a full 180 degree view in all directions. This results in a circular image at the center with the edges of the frame rendered black.

Full Frame Fisheye Lenses


Fish Eye Lenses in Architecture Photography
Photo by: Justin Brown


Full frame fisheye lenses captures a 180 degree field of view along its diagonal. The horizontal and vertical sides of the image are less than 180 degrees (typically around 150 degrees horizontal and 100 degrees vertical). Though they don’t capture as wide a frame as the circular type, pictures taken with them do not have black edges.

Using Fish Eye Lenses in Architecture Photography


A fish eye lens is never the first choice for straight architectural photography due to the distortions it causes. In extreme cases it distorts the structure beyond recognition. So its use is very limited in regular architectural work. But it could be used to give a very dramatic supplementary image to a regular distortion free image. And when shooting in very cramped spaces its ultra wide angle of view could be very helpful (in certain cases the only option available for you) to cover the whole scene in a frame.


 Fish Eye Lenses in Architectural Photography
Photo by: Dennis Wilkinson


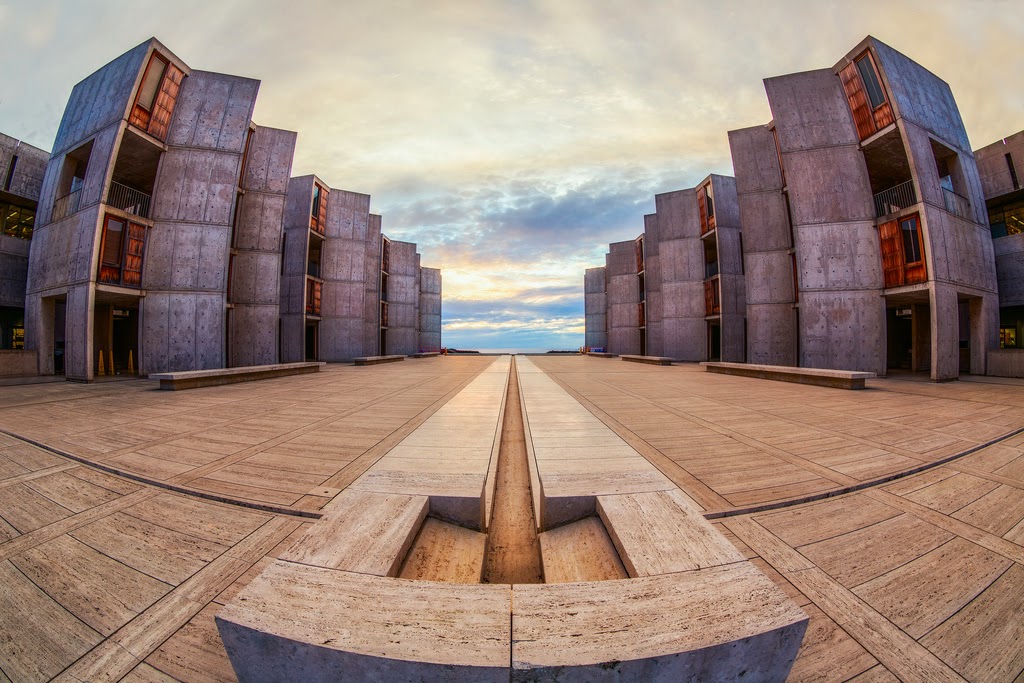
Thus fish eye lenses should be used more for effects rather than regular work; a great option for adding some surreal drama to your building shots. They work best on buildings which have a symmetrical design where bowed lines on one side of the image are perfectly mirrored by lines on the other side.

In situations where the results are not quite how you intended (un-usable due to extreme distortion) there are several software’s available that help correct the distortion and produce a straighter image; the downside to this is loss of resolution as you will end up with a slightly cropped final image.


Related Reading


Wednesday, 14 May 2014

Using Reflections in Architectural Photography Compositions


Generally when shooting architecture (especially interiors) we are very careful to avoid reflections of us, our lights etc. on any shiny surfaces present. Glass surfaces, shiny metal objects etc. all need to be double checked for any unwanted reflections. Lighting interiors without light sources being reflected in such objects is a very challenging task.


Using Reflections in Architectural Photography Compositions
Photo by: Luc B


But when it comes to photographing exteriors of buildings reflections can produce some of the most exciting, artistic effects.  They can create brilliant natural effects in photography and also add an extra dimension to architectural images; creative photographers use them as a canvas on which they could paint a tastefully distorted view of the building being photographed.

Since urban environments are lined with a multitude of reflective surfaces, one could easily find a suitable surface to capture a great reflection of the building. Windows, water bodies like ponds, lakes or fountains, wet streets, glossy paint or wind shields of cars, sunglasses, glass of a mirror-finished building adjacent to the one being shot etc. are all surfaces one could use.


reflections in architecture photography
Photo by: Jeff S. PhotoArt


One thing to note when photographing a reflected view of a building which is asymmetric or has a visible signage is that it could appear flipped and this could be a little un-settling to the viewers. When composing your frame which includes a reflected view of the structure in water make sure the water is completely still and the mirrored image is really crisp for best results.


Related Reading


  1. Creative Composition Tips for Architectural Photographers - Framing the Building
  2. Composition Tips for Architectural Photographers - Balancing Colors in an Image
  3. Tips for Photographing the Progress of a Building from Construction Through to Completion
  4. Getting Timing and Exposure Right for Night shots of Buildings
  5. Architectural Photography Composition Tips Expanding the sky area with Rising Shift Movement

Tuesday, 13 May 2014

Creative Composition Tips for Architectural Photographers - Framing the Building


Just as in other genres of photography, framing the subject (in our case buildings) works well most of the time. Composing the picture using creative framing helps give some context to the structure and create depth in the picture with different elements placed at different distances.


Framing the Building
Photo by: Brian Smithson


There are many elements, both natural and man-made that one could use as frames. One classic example of natural frame is a tree or just some branches. Including trees could add a welcoming natural feel to the buildings.

Other options which are man-made are arches, windows, flags or simply using other buildings. In certain cases even elements from the site layout could be very effectively used. Anything that helps create foreground interest, crop your image down and also give your subject some context should work fine.


Creative Composition Tips for Architectural Photographers
Photo by: Universal Pops


Framing with natural objects such as trees works better with traditional architecture which gels better with the natural environment than their modern counterparts who use dynamic lines to generate dramatic graphic impact.


Related Reading


  1. Composition Tips for Architectural Photographers - Balancing Colors in an Image
  2. Tips for Photographing the Progress of a Building from Construction Through to Completion
  3. Getting Timing and Exposure Right for Night shots of Buildings
  4. Architectural Photography Composition Tips Expanding the sky area with Rising Shift Movement
  5. Creative Architecture Photography Composition – Deliberately Tilting the Camera

Monday, 12 May 2014

Composition Tips for Architectural Photographers - Balancing Colors in an Image


We humans perceive an image as visually satisfying when the tension created by each of the three primary colors (red, blue and green) are perfectly counterbalanced by the other two. A quick look at the article on balance would be helpful here to understand that even a small patch of color strategically placed could counterbalance a vast area filled with opposing colors.

Composition Tips for Architectural Photographers Balancing Colors in an Image
Photo by: blinking idiot


The principles are very much applicable in architectural photography and in this article we will discuss how it applies when shooting exteriors and interiors.

Balancing Colors When Photographing Exteriors of Buildings


One color we always have in our frame while photographing exteriors of buildings is blue. Agreed that deep blue skies make interesting architectural photographs but not on its own. The picture works when the vast expanse of blue is counterbalanced by the greens in the foliage of the trees or the grass of the lawn and the red’s in the buildings doors, or roof tiles or even a car that is parked in front of the building.

While shooting exteriors be always aware of the color balance in your frame. If you are aware of it then you can easily correct any errors in your composition. Cars, flowers, potted plants, peoples clothing, letter boxes etc are elements that we could use to easily insert patches of specific colors in our frames. When inserting elements into your picture, always remember that animate objects (people walking by, car in motion etc) caught in motion adds more interest and drama to the frame than inanimate objects.

Take a look at the picture given below, it has all the three primary colors perfectly balanced and so the picture appears very pleasing to our eyes. Now try hiding the reds, or the greens with your finger and see the difference.


Composition Tips for Architectural Photographers
Photo by: José Miguel

Balancing Colors When Photographing Interiors of Buildings


Balance of colors is much more easily achieved in interiors than exteriors.  Since styling is part of the photographic workflow, a little care could go a long way in ensuring you have a perfectly balanced interior to shoot. Flowers, potted plants, pillows, a piece or rug, art work, etc could all be used as props that also serve to balance colors.

Find inspiration in specific elements present in the room and design accordingly using these elements as starting points. You can pull a wall color and make it your central source from which all your accent colors are chosen. Thus it will serve as an anchor that helps tie all the surrounding decor together. This will make your interiors more dynamic and ensure that the colors you are using perfectly complement each other.

Another trick that is quite popular is to use color as a framing technique. Using color as a border to a certain feature in your room is a great way to draw attention to it. If you have a window with a beautiful view, you could choose ornate drapes in a bold color draw the eye of the viewer to the scene outside. For a more asymmetrical design try grouping several framed paintings or pictures on one wall and place a similar colored couch across the room.

The most important thing to remember when using color to balance a room is to make sure that you are truly balancing the room. Once you pick our accent color, make sure you use the same color somewhere else in the space; similar colored pillows on the couch across from the accent wall or a chair the same hue as your curtains is how you will achieve balance and pull your room together.


Related Reading


Wednesday, 7 May 2014

Tips for Photographing the Progress of a Building from Construction Through to Completion


It is not uncommon for builders, developers and designers to document the developmental progress of a building from construction through completion. Such a job requires an architectural photographer to visit the construction site during various stages of progress and put together the pictures to properly convey how the building evolved or how it was transformed to its current state.


Tips for Photographing the Progress of a Building from Construction Through to Completion
Photo by: Jakob Montrasio


Although the general principles governing photographing construction sites are very much the same as those for completed structures, there are some additional factors that need to be paid attention to. We will discuss about those in this article.

First and foremost there are two types of shots that you will be required to make, one is a wide angle view showing the entire site, so that people will get an idea about the project as a whole. Then comes detail shots of specific portions of the building, these detail shots will be more or less abstract shots.


tips for photographing construction sites
Photo by: the Apocalypse according to


For both types of shots the important thing to remember is to take the pictures from the exact same spot, using the exact same focal length and composition every time. To make this happen you can either remember the tripod position (if need be you could mark the exact position of the tripod legs on the site floor using paint or any other material), height of the tripod (whether the legs were fully extended and whether or not the center column was used etc) if you are using a tilt shift lens it is good to remember the amount of shift if any was employed for the shots. One very helpful thing will be to bring pictures from your earlier shoot on location (save it on your smart phone or I pad) this will help you compose your frame exactly the same way as before.

For the wide angle whole view shot one should carefully select a good vantage point to shoot from. If there are site huts on location, the roof of one of the huts could be a good choice as these structures are not demolished until the completion of the construction and they will provide an undisturbed, semi aerial view of the whole site.


how to photograph buildings in construction
Photo by: the Apocalypse according to


If there is one sure fire tip to make your construction pictures more interesting it is to include people in your shots, shoot your scene with some action taking place in the foreground; such animated scenes always attract the attention of the viewers.

Construction sites are dangerous grounds for both you and your camera, always remember to wear protective gear wherever required (helmets, boots, reflective jackets, gloves etc.) Also make sure your equipment is well protected against dust and other elements; and whenever you are not shooting (long breaks between shots) keep your gear (especially camera) packed up.


Related Reading


Tuesday, 6 May 2014

Getting Timing and Exposure Right for Night shots of Buildings


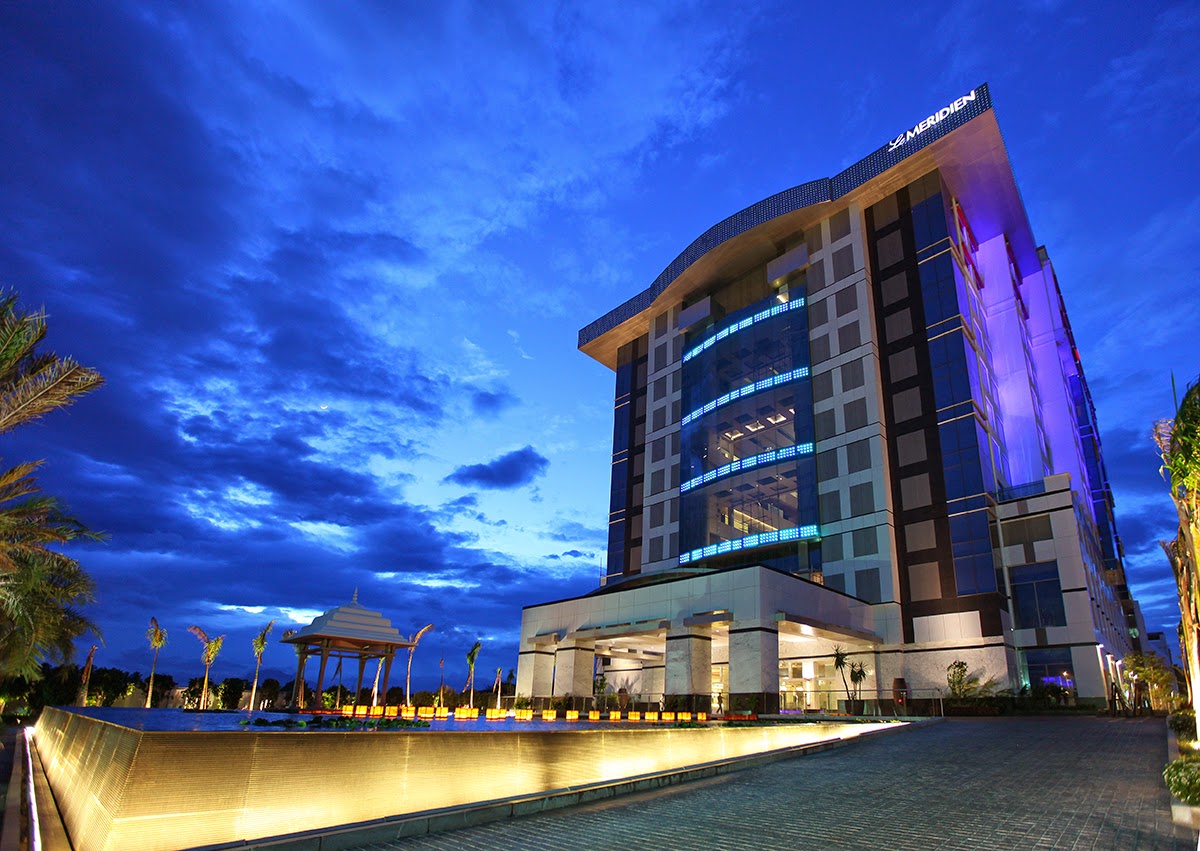
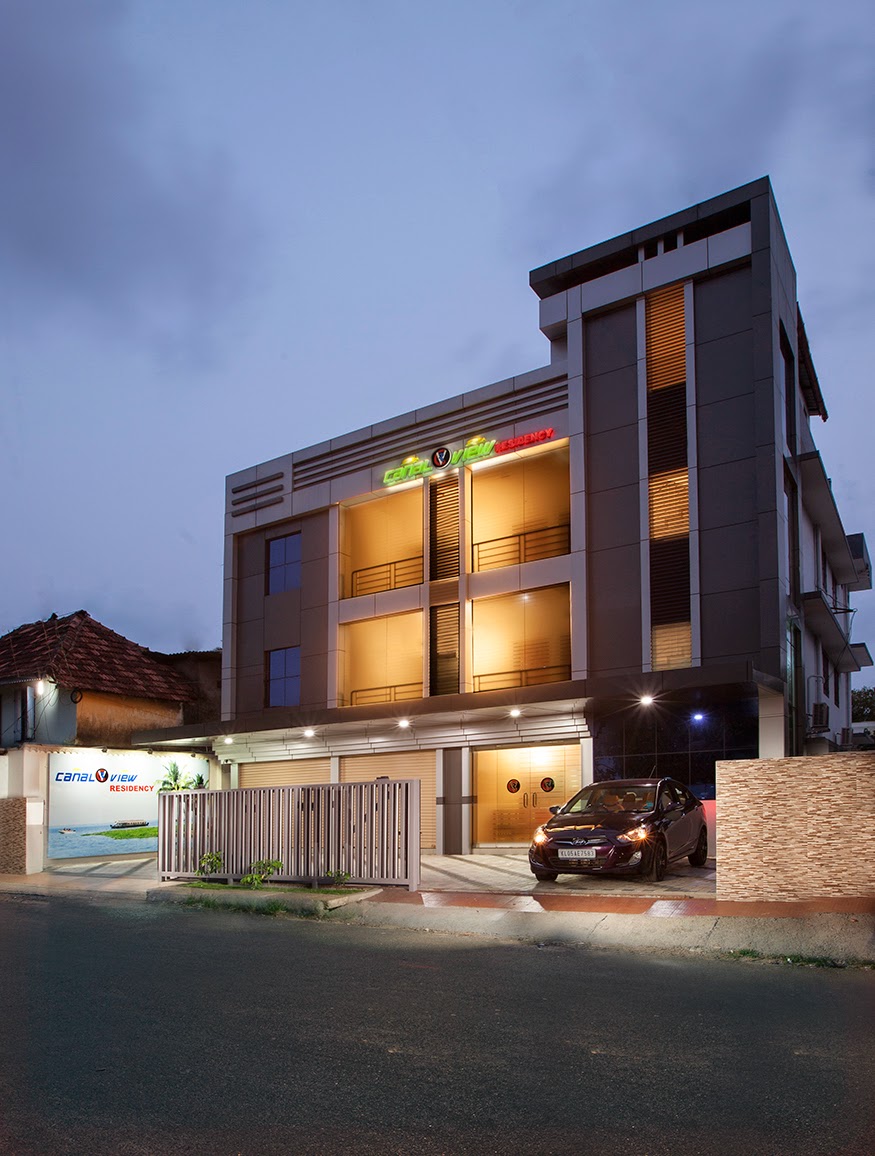
Night shots of buildings with warm glowing room lights that contrast well with the deep blue of the sky not only presents a clear view of both the exterior and the interior of the building but also has the effect of inviting the viewer to the warmness of the interiors from the coldness outside.


Getting Timing and Exposure Right for Night shots of Buildings
 Night shots of Buildings


While day time view of a building could appear somewhat empty and lifeless, night shots represents a building that is completely functional; the view inside is also clearly visible as the details outside and this enlivens the structure. Skillfully executed night shots are often the most interesting of all architectural photographs; in this article we will discuss how to shoot the perfect night shot of any building.

Timing


Although they are called night shots, they are actually shots taken during dawn or dusk when the light levels outside matches well with that of interior lighting. Every day during dawn and dusk you will get a 20-30 minute window when the ambient light on the scene will be just right to retain surface detail of the building, the sky is light enough to contrast with the somewhat silhouetted outline of the building, and the interior lighting is showing through to record interiors in rich detail. The exact timing varies depending on many factors like the season, the geographic location of the building, exterior lighting of the building etc.

Technically the 30 minute time window is when the contrast levels of the dark and light areas in the scene fall within the limits of the dynamic range that the camera is able to record. Quality of light during dawn and dusk are almost the same, only difference is in the direction from which the ambient light will hit the subject. The bright glow produced by the rising sun will be in the east where are the bright glow produced by the setting sun will be in the west. So whether to shoot at dawn or dusk should be determined by considering the actual orientation of your building and the angle from which you decide to shoot it.

Generally it is not advisable to shoot your building with the rising or setting sun directly behind it as the bright glow in the sky will detract the viewers’ attention from your main subject that is the structure. When it is possible to choose either dawn or dusk for a shoot, it is recommended that you shoot at dusk. There are many reasons, first and foremost is the fact that during dusk you can clearly see the ambient light fading and the interior lights shining through. This gives you ample of time to bracket many exposures. But when shooting at dawn, in many cases by the time you realize that dawn has begun you may have already missed the perfect time to shoot the scene. The best technique is to start at dusk and keep shooting bracketed exposures till the sky goes completely dark. You will get many different variations of sky color, building tone and brightness levels of room lights to work with.

Determining the Right Exposure for Night Shots


When shooting architecture at dawn or dusk there are different things at play, ambient light levels are constantly changing and this changes the light ratio between the ambient and the interior (artificial) lights. In camera light meters will always suggest you an exposure that will render all subjects in the scene as a middle tone grey.  So if you go by the recommended settings you will most likely end up with exposures that have overexposed facades and underexposed interiors.

Our goal should be to get an exposure where the building appears dark (still retaining surface detail) while the light through the windows appear to glow brightly. Here we are talking about properly exposing a scene with a dynamic range of at-least 8 stops, which is beyond most cameras now are capable of producing. The most practical solution is to shoot bracketed exposures every 5 minutes or so from dusk to the point where either the sky goes completely dark or the interior lights appear to burn out losing detail. This will ensure that you have captured a full range of variable effects and gives you the option to either select the perfect image for any particular usage of combine some of the exposures later in post-production. 


Related Reading


  1. Architectural Photography Composition Tips Expanding the sky area with Rising Shift Movement
  2. Creative Architecture Photography Composition – Deliberately Tilting the Camera
  3. Architectural Photography Composition Tips - How to Photograph Long, Low Buildings
  4. How to Photograph Tall Buildings from Close Up
  5. Tips for Removing any Obstructions and to un-clutter the Front Elevation

Friday, 2 May 2014

Architectural Photography Composition Tips Expanding the sky area with Rising Shift Movement


One composition technique that works well to isolate a building from its surroundings is expanding the sky area in a picture by using the rising shift movements afforded by perspective control A.K.A Tilt Shift lenses.


Architectural Photography Composition Tips Expanding the sky area with Rising Shift Movement
Photo by: Rex Turgano


To expand the sky area in your composition, mount a tilt shift lens on your camera, place the camera in a portrait orientation, compose your picture with the sensor plane of the camera aligned perfectly parallel to the building and then use rising shift movement on the lens to place the building close to the bottom of the frame. Camera sensor being parallel to the building your verticals will all be perfect without any convergence. With the building now pushed towards the bottom, the rest of the frame will now comprise entirely of the sky. The trick works well when there is much contrast between the color of the building and the sky. One other thing that happens when using excessive shift movements is that the sky tends to darken towards the top of the frame (where the camera is now recording data from the outer limits of the lens’s circle of illumination) in most cases this subtle darkening (more like a vignette) enhances the look and feel of the image. If one wishes to further enhance this effect, it could easily be done by using a graduated neutral density filter.


Related Reading